DIY Friendship Bracelet With Flower Beads
Follow this super easy tutorial to create your own friendship bracelet to give to a friend (or keep for yourself!).
Aug 04, 2016
In honor of friends everywhere and Friendship Day, we decided to celebrate our BFFs with the timeless tradition of friendship bracelets. Consisting of a series of tied knots, friendship bracelets represent the strong and unbroken bond between two friends...and they look pretty, too!

Whether making a friendship bracelet as a gift for your closest friend or organizing a party to make bracelets with a group of friends, the sentimental value of handmade bracelets is priceless. Just like every friend, each bracelet is unique and can be made to fit your bestie’s personality. So, take out your string and let’s get crafty with these easy-to-follow instructions!
Supplies needed to make a friendship bracelet
- Embroidery floss
- Scissors
- Tape
- Flower beads (Make sure the holes of the beads are large enough.)
- Flower for inspiration
Instructions for making a friendship bracelet
1. Choose bracelet colors your bestie will love
Decide which colors you want to use for your bracelet. For ours, we used pink, lavender, purple, and dark purple. The more strings you use, the wider the bracelet will be.
2. Measure and cut the string
Measure out one string using your forearm as a guide, from your wrist to your elbow. If you are making the bracelet for your friend, consider the size of their wrist, and increase or decrease the size as needed. Cut the string to four times the length of your forearm, leaving a few extra inches for safe measure. (It is better to have more string than not enough.) Use your first cut string as a guide to measure the rest of your strings. All strings should be the same size. When you have finished cutting all your strings (we used four total, one for each color), place all the strings together and then fold your strings in half. This should leave you with two of each color.

3. Create a loop and get started
After folding the strings in half, create a loop. Tie the loop into a knot.
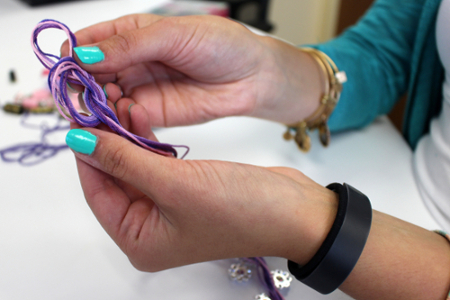
4. Create a sturdy and organized workplace

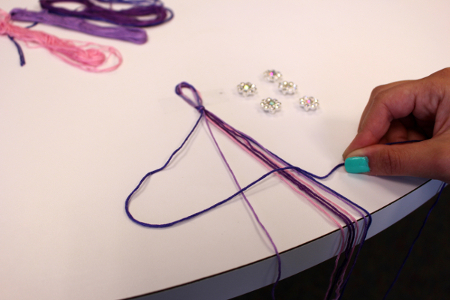
Tape your loop onto a flat working surface, such as a table. Spread out your strings so the colors are symmetrical.
5. Master the forward knot
To make the chevron stitch “V” shape, start from your left side (stitched from left to right) until you reach the middle, then work from your right side (stitched from right to left). The right and left side of the “V” stitch is completed by tying the two middle strings together, which should be the same color. Start with the left outermost strand (we used dark purple) and make a forward knot by crossing it over the next string (to the right) in a “4” shape, and looping it under and through the opening.
Pull the string up to tighten the knot. Repeat this step again using the same string (in our case, dark purple). One stitch consists of two forward knots per string. Make two forward knots per string, until you reach the middle.
6. Master the backward knot
Once you’ve reached the middle of the row, move to the right outermost strand. Create a “backward knot” by crossing it over the strand to its left and forming a “P” shape. Loop the strand under and through the opening of the “P.” Do this for each string until you reach the middle.
Tie the two middle strands (which should be the same color) using either a forward or backward knot.
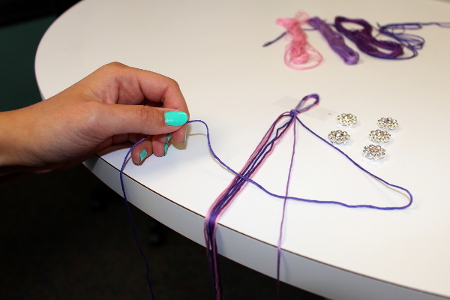
7. Repeat steps 5 & 6
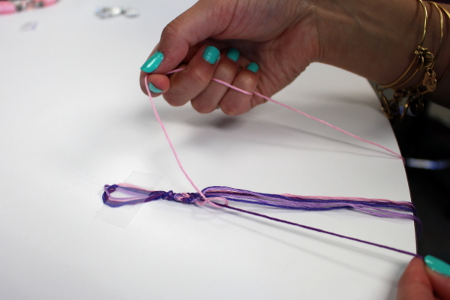
Continue doing forward knots on the left side, and backward knots on the right side, until you are halfway done with the bracelet. You can check if you are halfway done by measuring with your wrist.
8. Add your flower beads
This step may vary depending on what type of beads you have, how many beads you use, and where you would like to place them. You will want to place all strings through the one bead, so make sure your bead holes are large enough.

9. Repeat steps 5 & 6
Repeat steps 4 and 5 to continue the rest of the bracelet until it fits around your (or your BFF’s) wrist.
10. Complete your bracelet
Take the remainder of the string and neatly smooth it out into one large strand. Take the large strand of strings and tie it through the end of the loop to make it secure around your (or your friend’s) wrist.
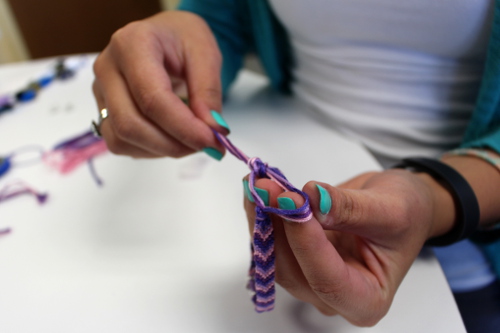
11. Gift your bracelet to your best friend


